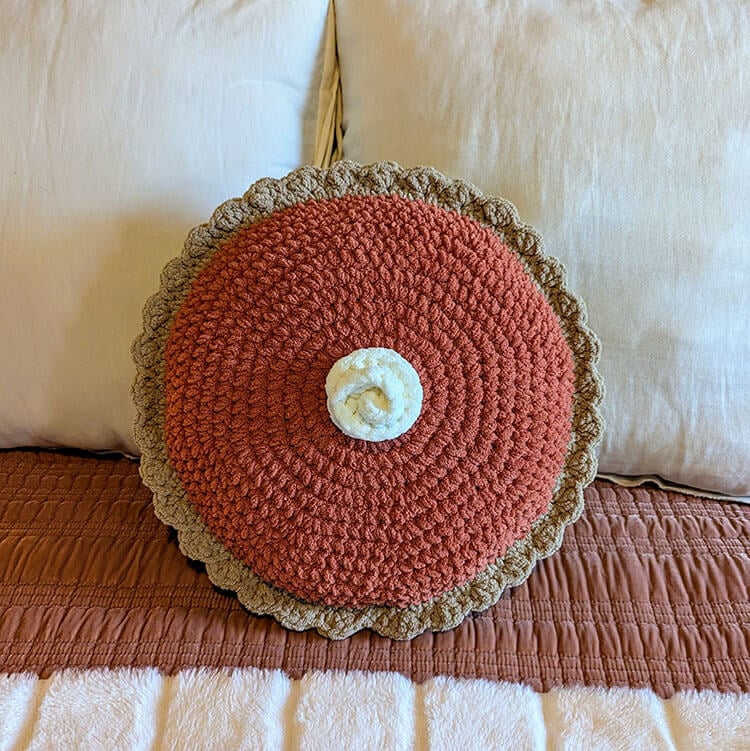
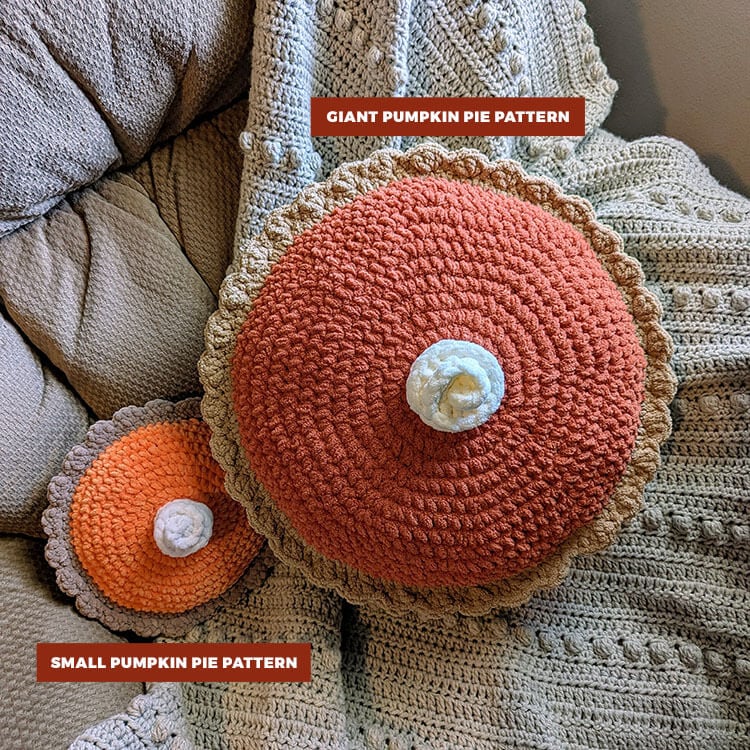
I’m super excited to be sharing a pattern for a Giant Pumpkin Pie Pillow! After making my small pumpkin pie, I knew I wanted to make something bigger and bolder, and I’m happy to say I’ve done that with this pillow.
You can find the free pattern below, or you can purchase the ad-free printable PDF from my shop.
This is a beginner friendly pattern that will make the perfect addition to your autumn decor. Place your pillow on your bed or sofa for the ultimate cozy fall feeling.
This post may contain affiliate links.
Materials:
- 1 Bernat Blanket #6 Super Bulky weight yarn in the color Sand.
- 1 Bernat Blanket #6 Super Bulky weight yarn in the color Orange Leaf.
- Small amount of Bernat Blanket #6 Super Bulky weight yarn in the color Vintage.
- US size L 8.0 mm crochet hook
- Poly-fil for stuffing
- Stitch marker
- Scissors
- Tapestry needle
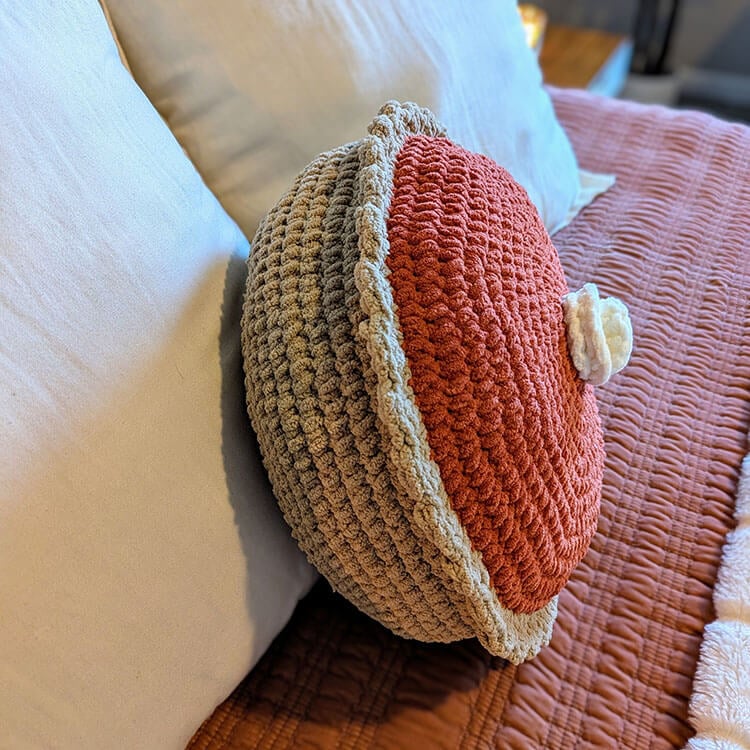
Size (approximate): 17” wide and 7” tall (not including whipped topping)
Pattern Notes:
- We’ll be working in continuous rounds. Unless mentioned specifically, do not join at the end of your rounds.
- The ch 1 does not count as a stitch.
Abbreviations (US):
ch – chain
st(s) – stitch(es)
sl st – slip stitch
sc – single crochet
sc blo – single crochet back loop only
inc – increase (work 2 stitches in the same stitch)
hdc – half double crochet
dc- double crochet
Want to print the pattern? You can purchase the ad-free printable PDF from my shop.
Giant Pumpkin Pie Pillow Crochet Pattern
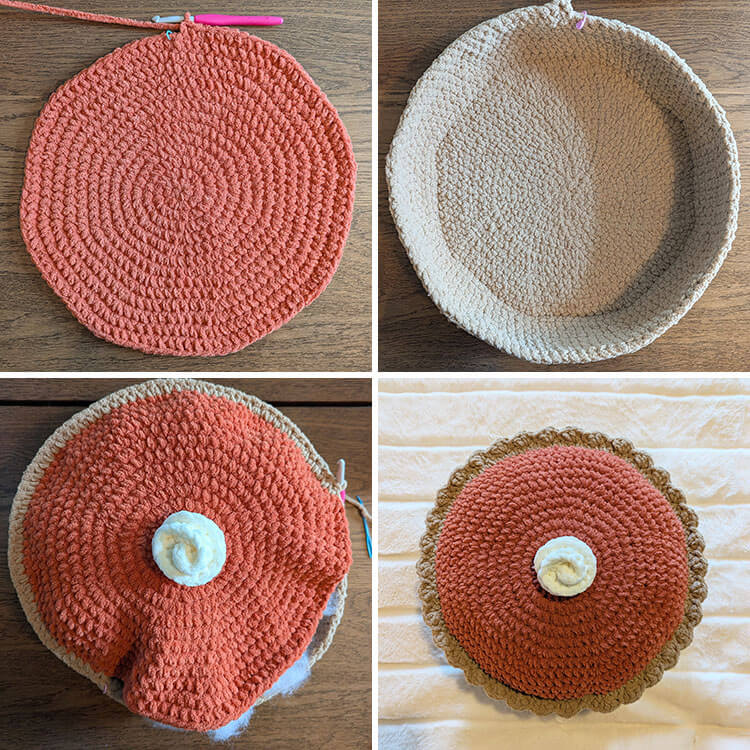
Make the Pie Filling (using the color Orange Leaf)
To begin Ch 2
Round 1: Place 8 sc into the 2nd chain from the hook. (8 sts)
Remember to place your stitch marker in the 1st stitch of each round. This will help you keep track of when you’re starting a new round.
Round 2: Inc in each stitch around. (16 sts)
Round 3: *Inc, sc in next st.* Repeat from * to * around. (24 sts)
Round 4: *Inc, sc in next 2 sts.* Repeat from * to * around. (32 sts)
Round 5: *Inc, sc in next 3 sts.* Repeat from * to * around. (40 sts)
Round 6: *Inc, sc in next 4 sts.* Repeat from * to * around. (48 sts)
Round 7: *Inc, sc in next 5 sts.* Repeat from * to * around. (56 sts)
Round 8: *Inc, sc in next 6 sts.* Repeat from * to * around. (64 sts)
Round 9: *Inc, sc in next 7 sts.* Repeat from * to * around. (72 sts)
Round 10: *Inc, sc in next 8 sts.* Repeat from * to * around. (80 sts)
Round 11: *Inc, sc in next 9 sts.* Repeat from * to * around. (88 sts)
Round 12: *Inc, sc in next 10 sts.* Repeat from * to * around. (96 sts)
Round 13: *Inc, sc in next 11 sts.* Repeat from * to * around. (104 sts)
Round 14: Place 1 sc in each stitch around. (104 sts)
Sl st to the 1st st, fasten off and weave in the ends.
Make the Crust (using the color Sand)
To begin Ch 2
Round 1: Place 8 sc into the 2nd chain from the hook. (8 sts)
Remember to place your stitch marker in the 1st stitch of each round. This will help you keep track of when you’re starting a new round.
Round 2: Inc in each stitch around. (16 sts)
Round 3: *Inc, sc in next st.* Repeat from * to * around. (24 sts)
Round 4: *Inc, sc in next 2 sts.* Repeat from * to * around. (32 sts)
Round 5: *Inc, sc in next 3 sts.* Repeat from * to * around. (40 sts)
Round 6: *Inc, sc in next 4 sts.* Repeat from * to * around. (48 sts)
Round 7: *Inc, sc in next 5 sts.* Repeat from * to * around. (56 sts)
Round 8: *Inc, sc in next 6 sts.* Repeat from * to * around. (64 sts)
Round 9: *Inc, sc in next 7 sts.* Repeat from * to * around. (72 sts)
Round 10: *Inc, sc in next 8 sts.* Repeat from * to * around. (80 sts)
Round 11: *Inc, sc in next 9 sts.* Repeat from * to * around. (88 sts)
Round 12: *Inc, sc in next 10 sts.* Repeat from * to * around. (96 sts)
Round 13: *Inc, sc in next 11 sts.* Repeat from * to * around. (104 sts)
Round 14: Place 1 sc blo in each stitch around. (104 sts)
Rounds 15-20: Place 1 sc in each stitch around. (104 sts)
Sl st to the 1st st, fasten off and weave in the ends.
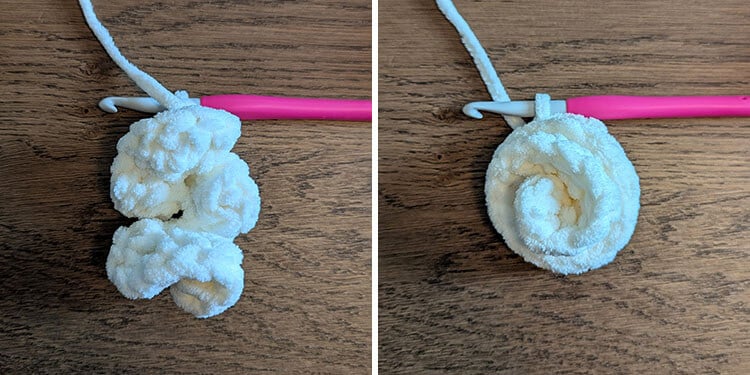
Make the Whipped Topping (using the color Vintage)
To begin ch 14
Place 3 dc sts in 2nd chain from hook and in each chain across. Fasten off and leave a long tail for sewing.
Wrap the whipped cream string on itself until it forms a spiral. You may have to play around with it to get it how you like it. Secure the whipped topping to the pie filling.
Attach the Crust and Filling, Stuff and Make Crust Edge
Place the orange filling on top of the crust. We’re going to sc the pieces together using the Sand colored yarn.
Round 1: Attach the yarn to any of the stitches, ch 1 and sc in the same st, work 1 sc in each st around, attaching the filling and crust. Before you close the pie, stuff it to your preference. After stuffing, continue to close the piece. (104 sts)
Sl st to the first st. Don’t fasten off. Continue on to round 2, where we’ll make the crust edge.
Round 2: Ch 1 and sc in same st, *3 hdc in next st, skip the next st, sl st in next st*. Repeat from * to * around. When you have 1 st remaining, skip that stitch, and sl st to the ch 1. Fasten off and weave in ends.
More Posts You May Like:
