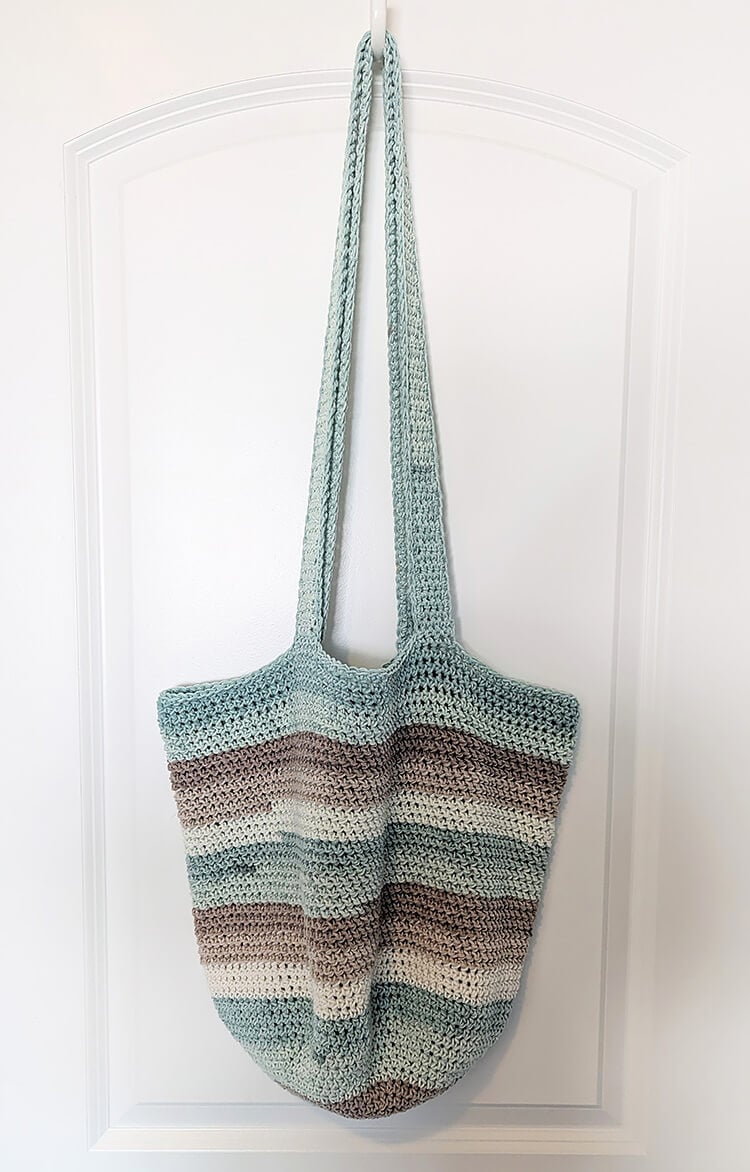
I’m so excited to share my Seaside Tote crochet pattern with you! This tote is the perfect companion for your summer adventures. Whether you’re heading to the beach, strolling through a local farmer’s market, or spending the day at a summer festival, I think you’ll love this tote.
You can find the free pattern below, or you can purchase the ad-free printable PDF from my shop.

*This post may contain affiliate links.
Seaside Tote Yarn Recommendation
For the best results, I highly recommend using cotton yarn for this project. Cotton is a fantastic choice for tote because it’s strong, durable, and holds up well to frequent use. It also washes easily, which is especially helpful when your tote takes a trip to the beach or ends up carrying fresh produce.
Additionally, a tote made with cotton yarn will stretch less than one made with acrylic yarn, which means your tote will better maintain its shape as you use it.
Keep in mind though, no matter what type of yarn you choose, a crochet tote will stretch, especially over time and with heavier items. If you want your tote to stay true to its shape, I recommend lining it with fabric. Adding a lining can make a big difference in the longevity of your tote.
Want to print the pattern? You can purchase the ad-free printable PDF from my shop.
Materials:
- 1 Caron Cotton Cakes in the color Beach Glass (530 yds). This yarn is 60% cotton, 40% acrylic. If you like to control your colors when using self-striping yarn, you may want to buy an additional ball of yarn. For a tote that will stretch less, you can use a 100% worsted weight cotton yarn such as Lily Sugar ‘N Cream. 5 balls of the Lily Sugar ‘N Cream should be enough for this tote.
- US size H 5.0 mm crochet hook
- Stitch markers
- Scissors
- Tapestry needle
Size (approximate): 15” tall (not including strap) and 18” wide
Pattern Notes:
- We’ll be working in continuous rounds. Do not join at the end of your rounds.
- The chains for the straps do not count as stitches.
Abbreviations (US):
ch – chain
st(s) – stitch(es)
hdc – half double crochet
hhdc – herringbone half double crochet: Yarn over. Insert your hook into the stitch. Yarn over and pull through the stitch AND through the first loop on the hook (you now have 2 loops on the hook). Yarn over and pull through both loops.
sc – single crochet
inc – increase (work 2 stitches in the same stitch)

Want to print the pattern? You can purchase the ad-free printable PDF from my shop.
Seaside Tote Crochet Pattern
Note: Rounds 1-15 are for the base of the tote and determines the width of the tote. For a smaller tote (widthwise), you can do less rounds.
To begin ch 2
Round 1: 8 hdc into 2nd chain from the hook. (8 sts)
Remember to place your stitch marker in the 1st stitch of each round. This will help you keep track of when you’re starting a new round.
Round 2: Inc in each stitch around. (16 sts)
Round 3: *Inc, hdc in next st.* Repeat from * to * around. (24 sts)
Round 4: *Inc, hdc in next 2 sts.* Repeat from * to * around. (32 sts)
Round 5: *Inc, hdc in next 3 sts.* Repeat from * to * around. (40 sts)
Round 6: *Inc, hdc in next 4 sts.* Repeat from * to * around. (48 sts)
Round 7: *Inc, hdc in next 5 sts.* Repeat from * to * around. (56 sts)
Round 8: *Inc, hdc in next 6 sts.* Repeat from * to * around. (64 sts)
Round 9: *Inc, hdc in next 7 sts.* Repeat from * to * around. (72 sts)
Round 10: *Inc, hdc in next 8 sts.* Repeat from * to * around. (80 sts)
Round 11: *Inc, hdc in next 9 sts.* Repeat from * to * around. (88 sts)
Round 12: *Inc, hdc in next 10 sts.* Repeat from * to * around. (96 sts)
Round 13: *Inc, hdc in next 11 sts.* Repeat from * to * around. (104 sts)
Round 14: *Inc, hdc in next 12 sts.* Repeat from * to * around. (112 sts)
Round 15: *Inc, hdc in next 13 sts.* Repeat from * to * around. (120 sts)
Note: We will now start the body of the tote. For a shorter tote, when you reach rounds 20-43, you can do less rounds.
Rounds 16-19: Place 1 hdc in each stitch around.
Rounds 20-43: Place 1 hhdc in each stitch around.
Rounds 44-46: Place 1 hdc in each stitch around.
Round 47: Place 1 sc in each stich around. Fasten off and weave in ends.
Make the Straps
*Make 2 straps*
Row 1: Ch 5, place 1 sc in the 2nd ch from the hook and in each ch across. Ch 1 and turn. (4 sts)
Row 2: Place 1 sc in each st across, ch 1 and turn. (4 sts)
Repeat row 2 until your strap reaches approximately 29” or 128 rows. You can make your strap as short or long as you want.
If you don’t want to add a border around your straps, you can fasten off and weave in your ends. If you want to add a border, keep your yarn attached and follow the instructions below.
How to Add a Border to the Straps
*Do this for both straps*
Round 1: With your yarn still attached, ch 1 and sc around the strap. Whenever you reach a corner, place 2 sts in the corner. When you reach the corner where you started, place 2 sts in the starting corner, sl st to the next st, fasten off and weave in the ends.
Note: It can be difficult to see your stitches when crocheting along the sides. Just do your best here. The stitch count is not important.
Attach the Straps to the Tote
Lay your tote flat on a table. Take one of the straps and place the two short ends of the strap on top of the tote. Each end should be about 5 inches from the sides of the tote. You can use a stitch marker to hold the strap in place.

Now, you can either sew your strap to the tote using the whip stitch (or your preferred stitch) or you can sc them together using your yarn and hook. Fasten off and weave in your ends.

After you’ve attached your first strap, flip the tote over and repeat the process with the other strap. There you have it, your tote is now complete!
More Posts You May Like: