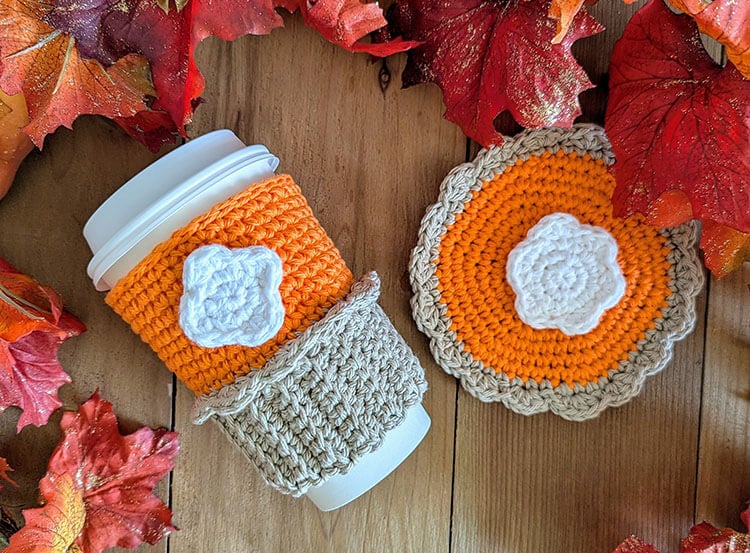
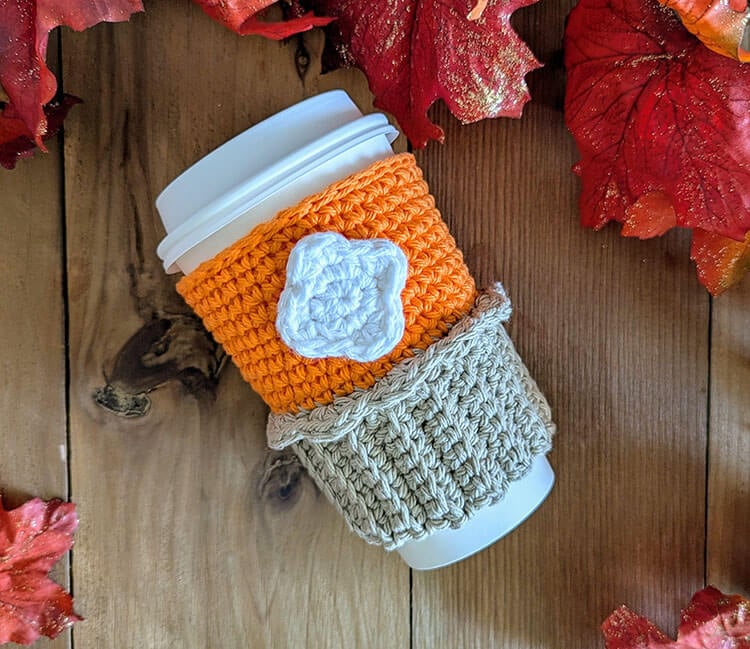
As soon as the air turns crisp and the leaves start to change, I can’t help but think of all things pumpkin pie. I wanted to bring a bit of that cozy autumn feeling into my crochet projects, which is why I designed this Pumpkin Pie Cup Cozy!
You can find the free pattern below, or you can purchase the ad-free printable PDF from my shop.
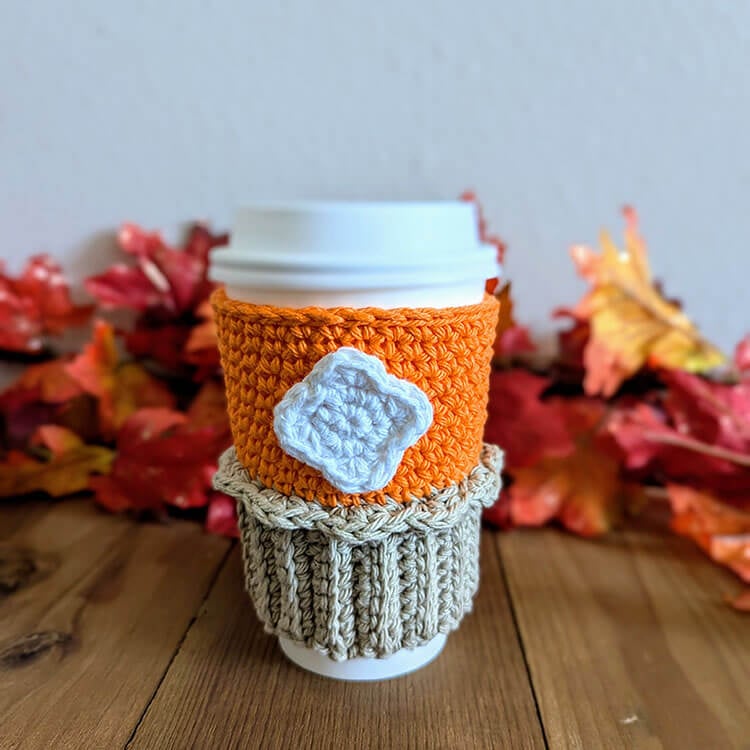
It’s the perfect little accessory to keep your hands comfortable while sipping your favorite fall drinks. I’m excited to share this pattern with you so you can make your own cute cozy.
This post may contain affiliate links.
Materials:
- #4 medium weight cotton yarn (I used Classic Cotton Yarn by Loops and Threads) in the colors orange, tan, and white.
- US size G 4.0 mm crochet hook
- Stitch marker
- Scissors
- Tapestry needle
Size (approximate): 4.5” x 4.25”
Abbreviations (US):
ch – chain
st(s) – stitch(es)
sl st – slip stitch
sc – single crochet
sc blo – single crochet back loop only
inc – increase (work 2 stitches in the same stitch)
hdc – half double crochet
Want to print the pattern? You can purchase the ad-free printable PDF from my shop.
Pumpkin Pie Cup Cozy Crochet Pattern
Make the Crust (using the color Tan)
To begin ch 9
Row 1: Place 1 sc in the 2nd ch from the hook and in each ch across. Ch 1 and turn. (8 sts)
Rows 2-34: Sc blo in each stitch across. Ch 1 and turn.
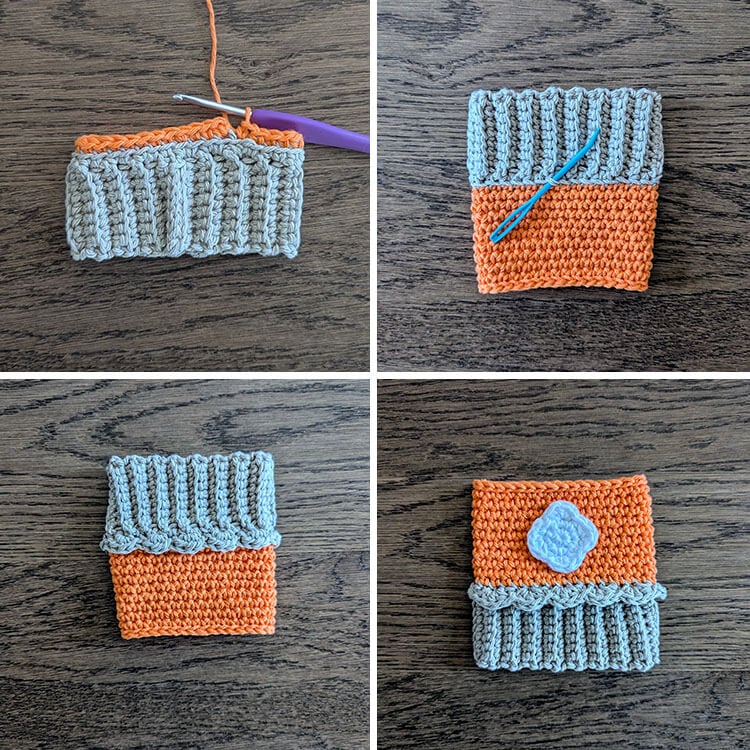
Fold the crust in half with the short sides together and join the last row to the first row with a sl st. Sl st through each st to connect the ends.
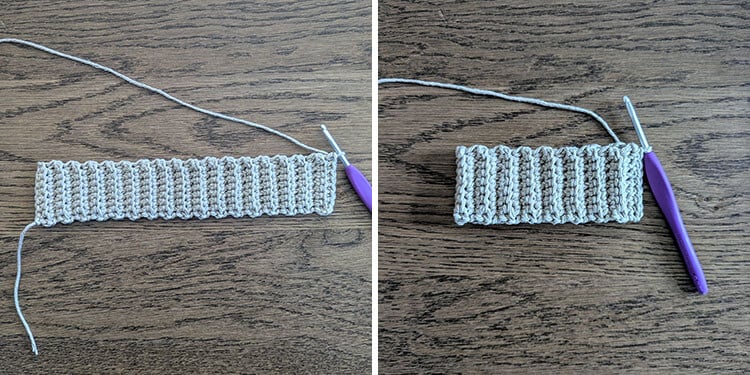
Round 1: Ch 1 and place 1 sc in each st going around the crust. (34 sts)
Fasten off and weave in ends.
Note: Make a note to yourself that we will be working into the front loops of these sts for the “Crust Edge.”
Make the Pie Filling (using the color Orange)
We’ll be working in continuous rounds. Unless mentioned specifically, do not join at the end of your rounds.
Round 1: Attach the yarn to any stitch at the top of the crust, ch 1 and sc blo in the same st, work 1 sc blo in each st around. (34 sts)
Remember to place your stitch marker in the 1st stitch of each round. This will help you keep track of when you’re starting a new round.
Rounds 2-10: Work 1 sc in each st around.
Round 11: Sl st in each st around.
Fasten off and weave in ends.
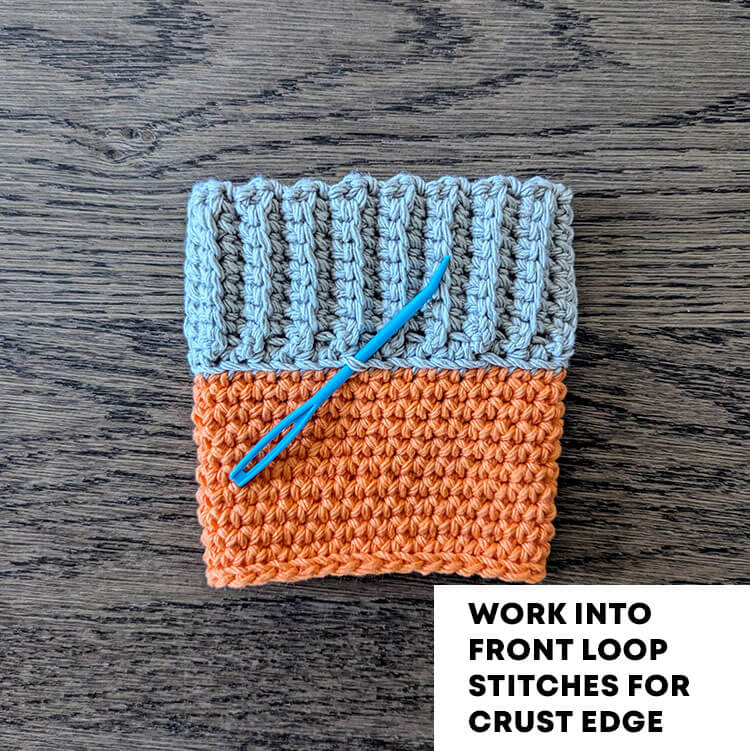
Make the Crust Edge
Turn the cup cozy upside down so that the crust is at the top.
Round 1: Attach the yarn to any front loop stitch from round 1 of the “Make the Crust” section, ch 1 and sc in same st, *3 hdc in next st, skip the next st, sl st in next st*. Repeat from * to * around. When you have 1 st remaining, skip that stitch, and sl st to the ch 1.
Fasten off and weave in ends.
Turn your cup cozy right side up.
Make the Whipped Topping (using the color White)
We’ll be working in continuous rounds. Unless mentioned specifically, do not join at the end of your rounds.
To begin ch 2
Round 1: Place 6 sc into the 2nd chain from the hook. (6 sts)
Remember to place your stitch marker in the 1st stitch of each round. This will help you keep track of when you’re starting a new round.
Round 2: Inc in each stitch around. (12 sts)
Sl st to the first st.
Round 3: Ch 1 and sc in same st, *3 hdc in next st, skip the next st, sl st in next st*. Repeat from * to * around. Sl st to the ch 1.
Fasten off and leave a long tail for sewing.
Secure the whipped topping to the center of the pie filling.
More Posts You May Like:
